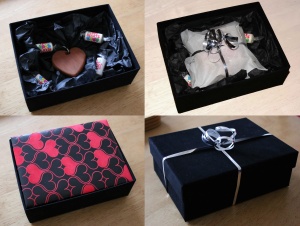
In preparation for Valentine’s day, and as I’ve been stuck at home for the week, I thought I’d make a rigid box to go with a home made gift I was planning.
Although readily available from the shops these days, making your own can mean you can be flexible with materials, colours and sizes and will make the difference between a cobbled together design and something that looks like a gift to be kept.
Talking to traditional box makers, you’d think it was a dark art, but following some basic tips and a bit of practice, it can be a satisfying way to add a bit of luxury to your home made gift.
What do you need?
All the tools can be found at your local craft shop or DIY store and are as follows:
Tools
- A sharp blade, I prefer a scalpel but a craft knife would work.
- Steel measuring rule
- A sharpened pencil
- Masking tape (this needs to be the paper type)
- Adhesive. A strong spray mount can work well but make sure you have a ventilated area (or the garden) close to where your working.
- A firm surface to work on (I’m working on the dining table with a cutting mat to protect the surface)
Materials
- A sheet of Rigid pulp board: I’m using a grey board which has a black coating on one side. The material needs to be between 1 & 2mm thick (1000-2000mic or 0.04-0.08″). One side of the board will be visible on the inside, so you can coat this or use a coloured or pre-coated material as I am, but these boards can be expensive so a solid grey or display board can also be used.
- A covering material: I’m cheating by using self adhesive material, but any substantial paper such as wrapping paper works well. You don’t want to be able to see through it and the adhesive needs to stick well, so this may need some experimenting, but if it’s paper on the inside, and not too thick, you can’t go far wrong.
The Method
Step 1: measure the base.
I like to use the edge of the board to keep my lines square. Start by drawing the base panel offset from the edges by the depth of the box.
the side that we’re drawing onto will become the outside of the box, so if you have a coated side, make sure this is face down.

Step 2: Measure the sides
The long sides of the box are the same length as the base, so just extend these lines out from your base. The short sides need to be stepped outwards by the material thickness. For me this is 1.5mm, and this allows the material to overlap in the corners. Extend and join the lines to form a cross shape.

Step 3: Cut out the board panel.
All the outer lines including the short (1.5mm) step should be cut through. The 4 lines making up the base panel need to be scored half way through. This takes a bit of practice but I would suggest several gentle strokes testing each time. If you’ve cut through far enough, the panel should fold neatly. Be careful not to cut too far through as the corners will be too weak.

Step 4: Forming the box
Taking some neat lengths of masking tape, fold up the sides and join them together like a but joint with the shot edges overlapping the long edges. This will form the main structure of the box so it’s important that the tape is firmly stuck.
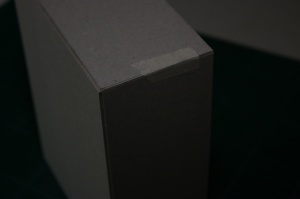
Step 5: Mark the covering position.
The covering needs to fold over the edges onto the inside by about 15mm (1/2″). Normally I’d draw this out on the CAD table but if you use the made up box as a guide, this is not too difficult to draw by hand. I have a grid on the backing paper of my covering which helps to ensure it’s square, but using the edge of the material (and careful measuring) works too. Using a ruler, position the box 15mm from your starting edge, then roll it over so that it is sat on its base. Measure the distance from the edge and position the box the same distance from the short edge.


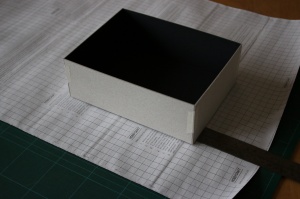
Step 6: Mark the corners
place a dot at 45 degrees out from each corner, about material thickness away from the box. This will be the starting point for our layout and will help us re-position the box later.

Step7: Drawing the wrap outline.
From these dots, we’re going to create a kind of cross shape with some extra flaps to make it neat.
Start by joining the dots to form a rectangle. Then mark diagonal lines outwards from each corner about 25mm (1″) long. The long sides of the paper, will wrap up and around the corners onto the short edges by about 15-20mm. The diagonal lines form the start of these new flaps.
Using the outer flap distance you measured before, draw the outer edges of the wrap by creating a rectangle equi-distant from the base rectangle.
You can now form the long sides of the box by drawing vertical lines offset by 20mm and meeting the diagonal lines towards the middle.

The short sides need to be cut in from the corners, so that they can fold over neatly inside the box. Measure the inside dimension using the measuring rule and draw parallel lines offset from the base panel and extended outwards towards the outer rectangle. At the corners draw a V shape so that these parallel lines meet the diagonals of the long edges at a point.
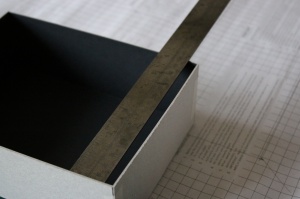
Step 8: cut out the wrap.
Using the ruler and following the lines you have drawn, carefully cut the wrap. You may need to change the blade to make sure you have a neat edge. You will be left with a shape like this:

Step 9: apply the adhesive
if like me you’re using self adhesive material, carefully remove the backing. You may find the material is a bit curly so perhaps leave it under some books for a while first to stop it sticking to itself. If you’re using spray adhesive, you need to be quick here. It’s important to apply a good even coat, but note that the glue starts to set off quickly so read through the next steps carefully and maybe practice first as it is important to make up the rest of the box before the glue dries.
Step 10: Position the box

Place the glued wrap face down on the surface so that the glued side is up. By aligning the corners of the box with the V shapes you made, carefully and firmly press the box down onto the wrap. Quickly check and smooth any bubbles out, and place back down.
Step 11: Fold up the long edges
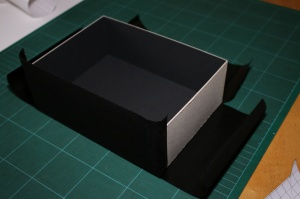
Start by pulling the centre of the long edge upwards tightly then using your other hand smooth the wrap outwards towards the edges to ensure there are no ripples. Fold the angled tabs around the corners and press down firmly. Repeat for both sides.
Step 12: fold down the turn-ins
Next you need to fold the turn ins down. I like to make a short upwards cut in the corners to make this easier, especially with thicker materials as it relieves the pressure. Start by folding the corners down, then move to the middle and press outwards. You will need to be firm to make sure the adhesive sticks and that the corners are neat. Repeat for both sides.


Step 13: Fold up the short edges
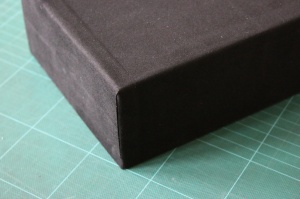
Now the short edges can fold up and over and cover all the tabs. Work from the middle outwards as before and press the turn-in down firmly. The cut back that we drew earlier should ensure that you have a nice even seam at the corners. Repeat for both sides.
Step 14: making the lid
The lid is exactly the same and follows the same steps as before. This is where you can get creative. I’ve chosen a short height lid like a shoe box of about 30mm deep, remember that the base panel of the lid needs to be bigger than the base box, so measure the outside dimensions and add a bit of room for friction (a millimetre or two) to each side. If you want the lid to be full height, use the same depth as the base. You can also try contrasting colours or prints, ribbons or filling materials. I went fairly plain as I was limited to what I had in the cupboard, but the materials available these days mean you can create some really nice effects.

…most of all have fun!
