Today I’ve had a bone marrow biopsy, I was a little nervous about this procedure as it’s fairly invasive in it’s nature and I expected some pain or discomfort. I’m fairly slim (apart from the growth in my bowel which makes me look like I have a beer belly!) which means that the bone in my hip where they have taken the sample is fairly close to the surface.
The reason for taking this sample is that as my form of cancer is related to white blood cells, there is a chance that the bone marrow has been infected. From this sample, they can asses how far these cells have migrated.
The nurses and Doctors were fairly reassuring and helped to explain each stage, but I thought I’d explain the procedure from my point of view. I should also add that experience will be different for different people so please talk to your specialist if you have any concerns.
step 1 – anaesthetic.
The anaesthetic is applied first to numb the area and the soft tissues that the biopsy needles will be passing through.
obviously the needle is fairly large as they need to insert one needle to puncture the bone then another to collect the sample. The anaesthetic is applied using a needle which gives a sharp scratch. Due to the amount of tissue between the skin surface and the bone, this needle is quite long and as it went in and as the liquid was injected I found this a little uncomfortable, but this discomfort was probably more tolerable than I would expect from a dentist.
step 2 – bone marrow aspirate
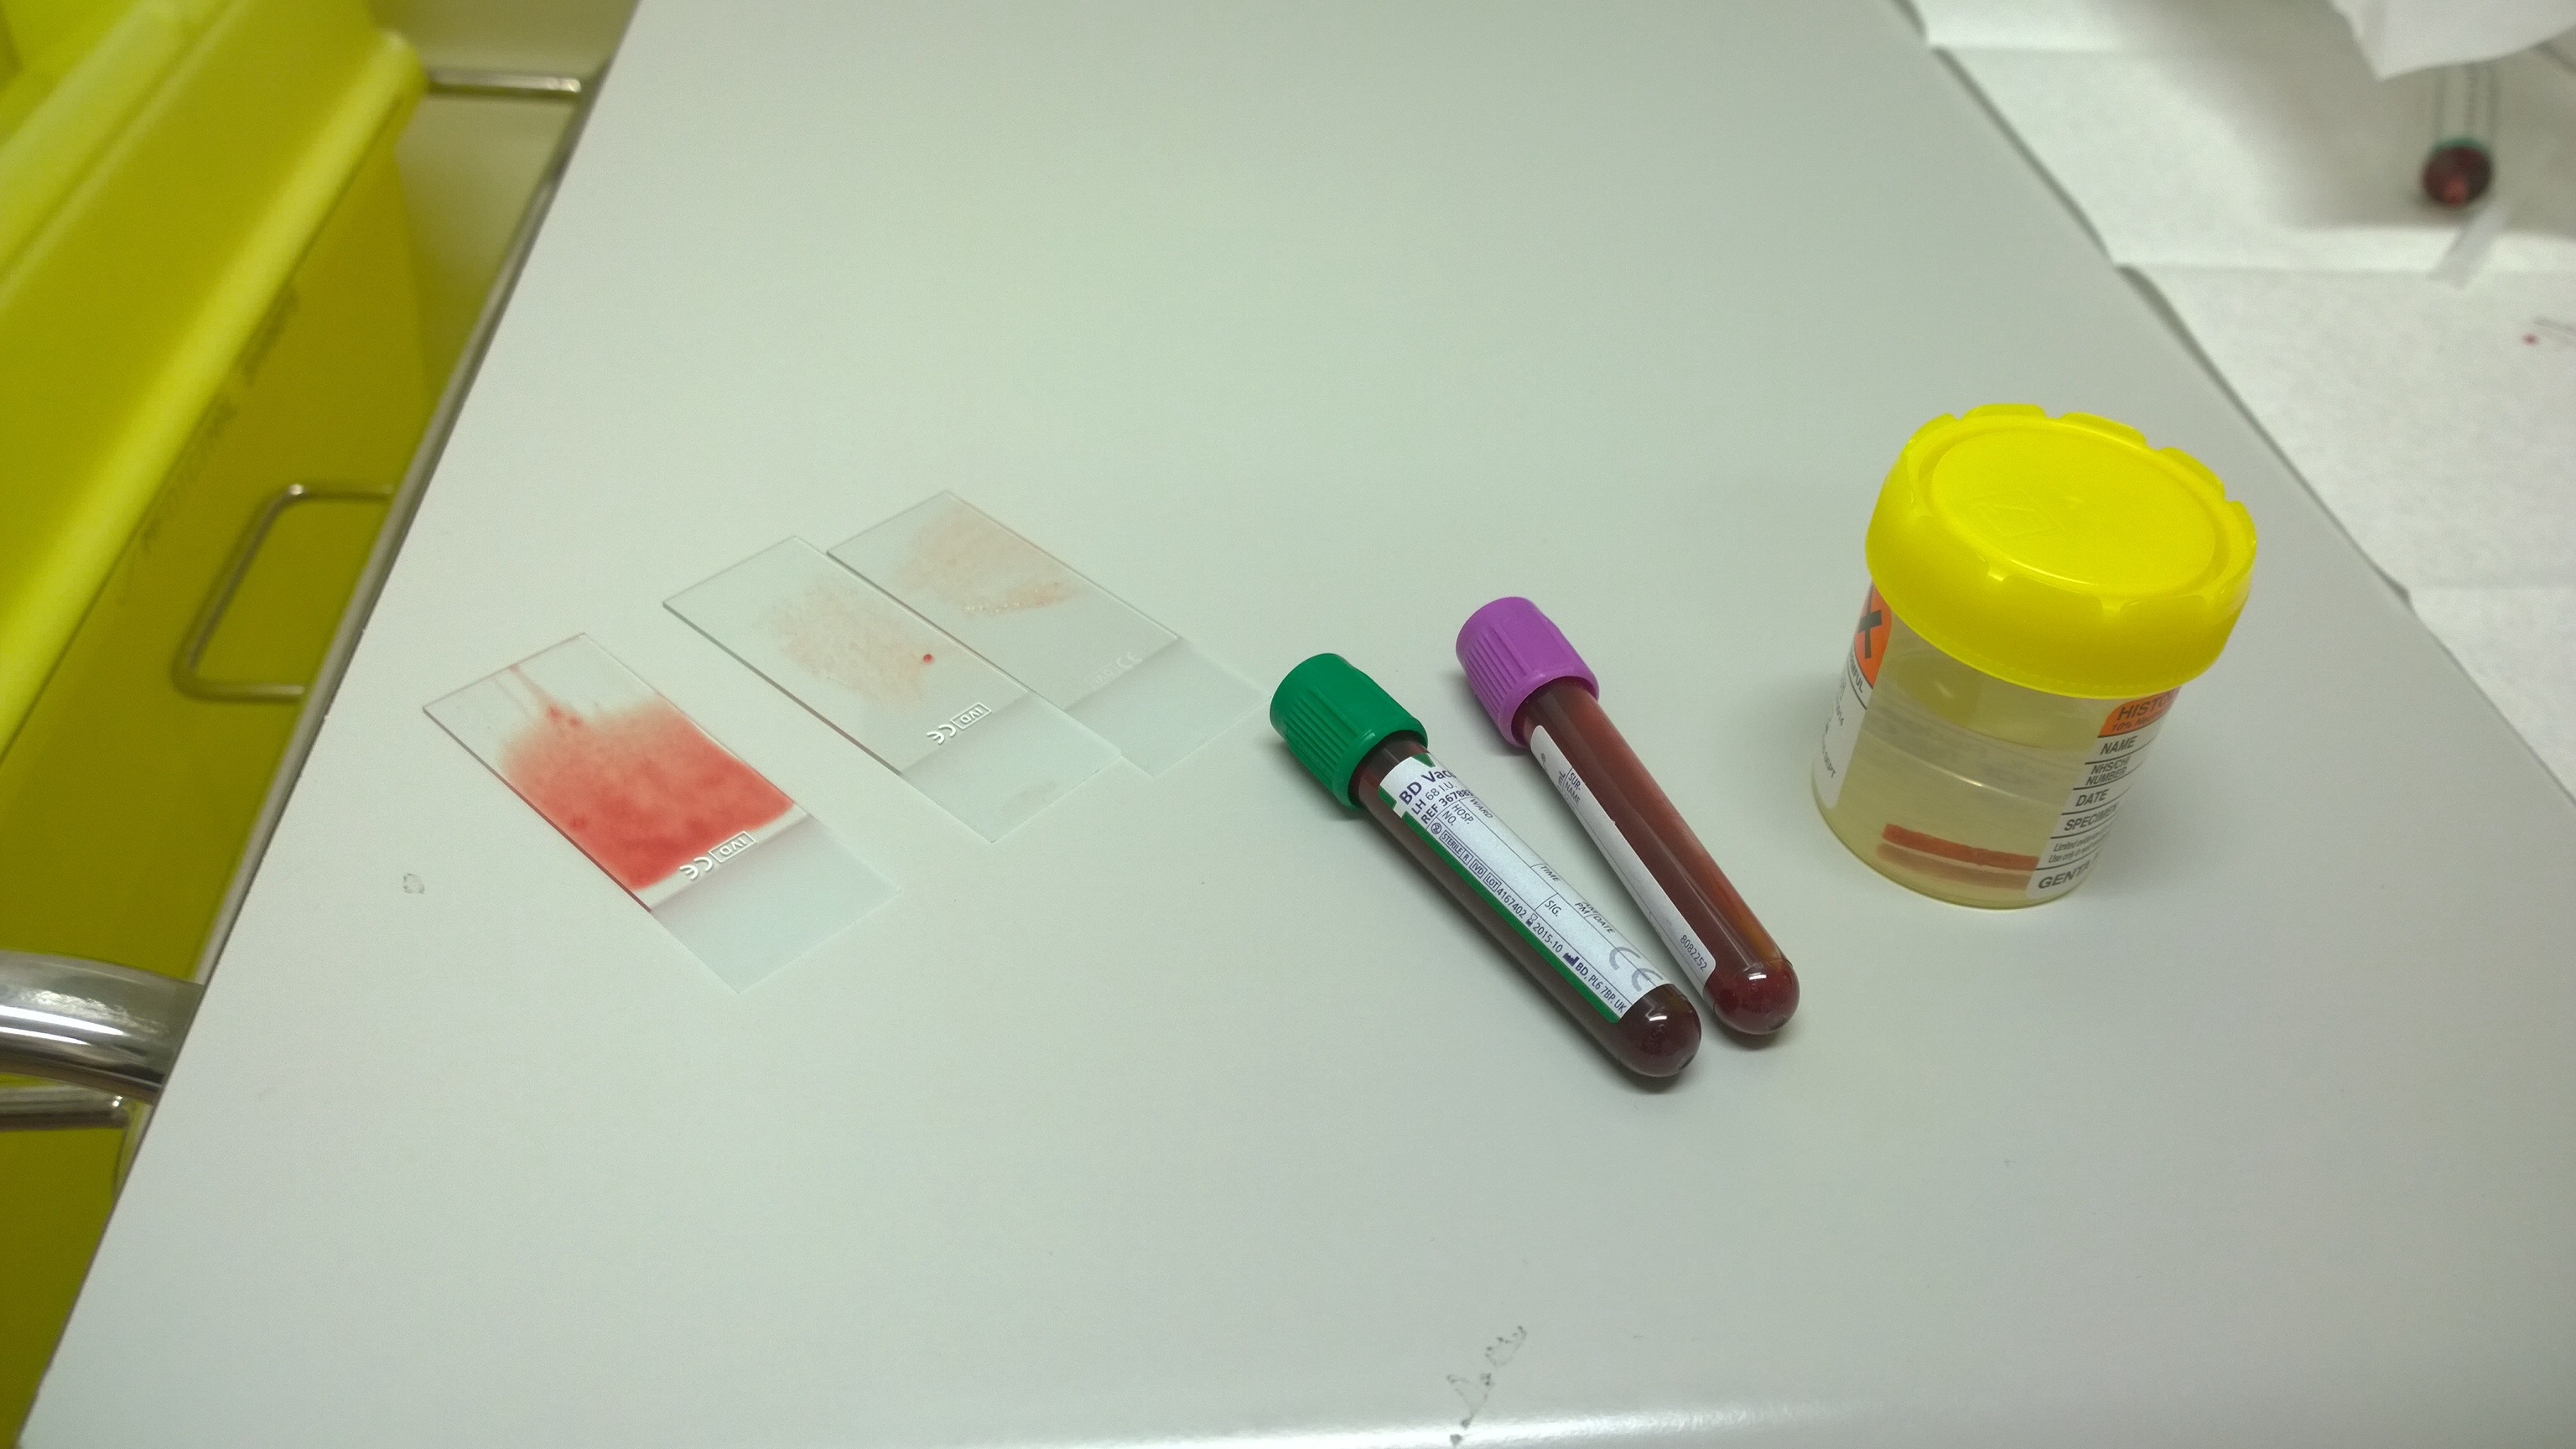
this first step is to extract a sample of fluid from the bone marrow. From me they took 2 vials (the same as for blood tests). The sample is taken with a long needle which passes straight into your bone. Being a long distance runner, my bones are fairly hard which means the needle took a lot of effort to puncture the bone. The first part as it passed through the tissue was fairly pain free and when it reached the bone the discomfort was tolerable. Rather than a stinging sensation, it felt more like a numb throb as I felt the pressure on my hip and the liquid drain. The nurse explained that sometimes as the pressure is released there can be a bit of discomfort, which I experienced as a numb throbbing perhaps warm sensation.
at this point, the nurse also prepared some slides so that the liquid can be assessed under the microscope. What he’s looking for here is lumps of bone marrow which can sometimes be mixed in with the blood.
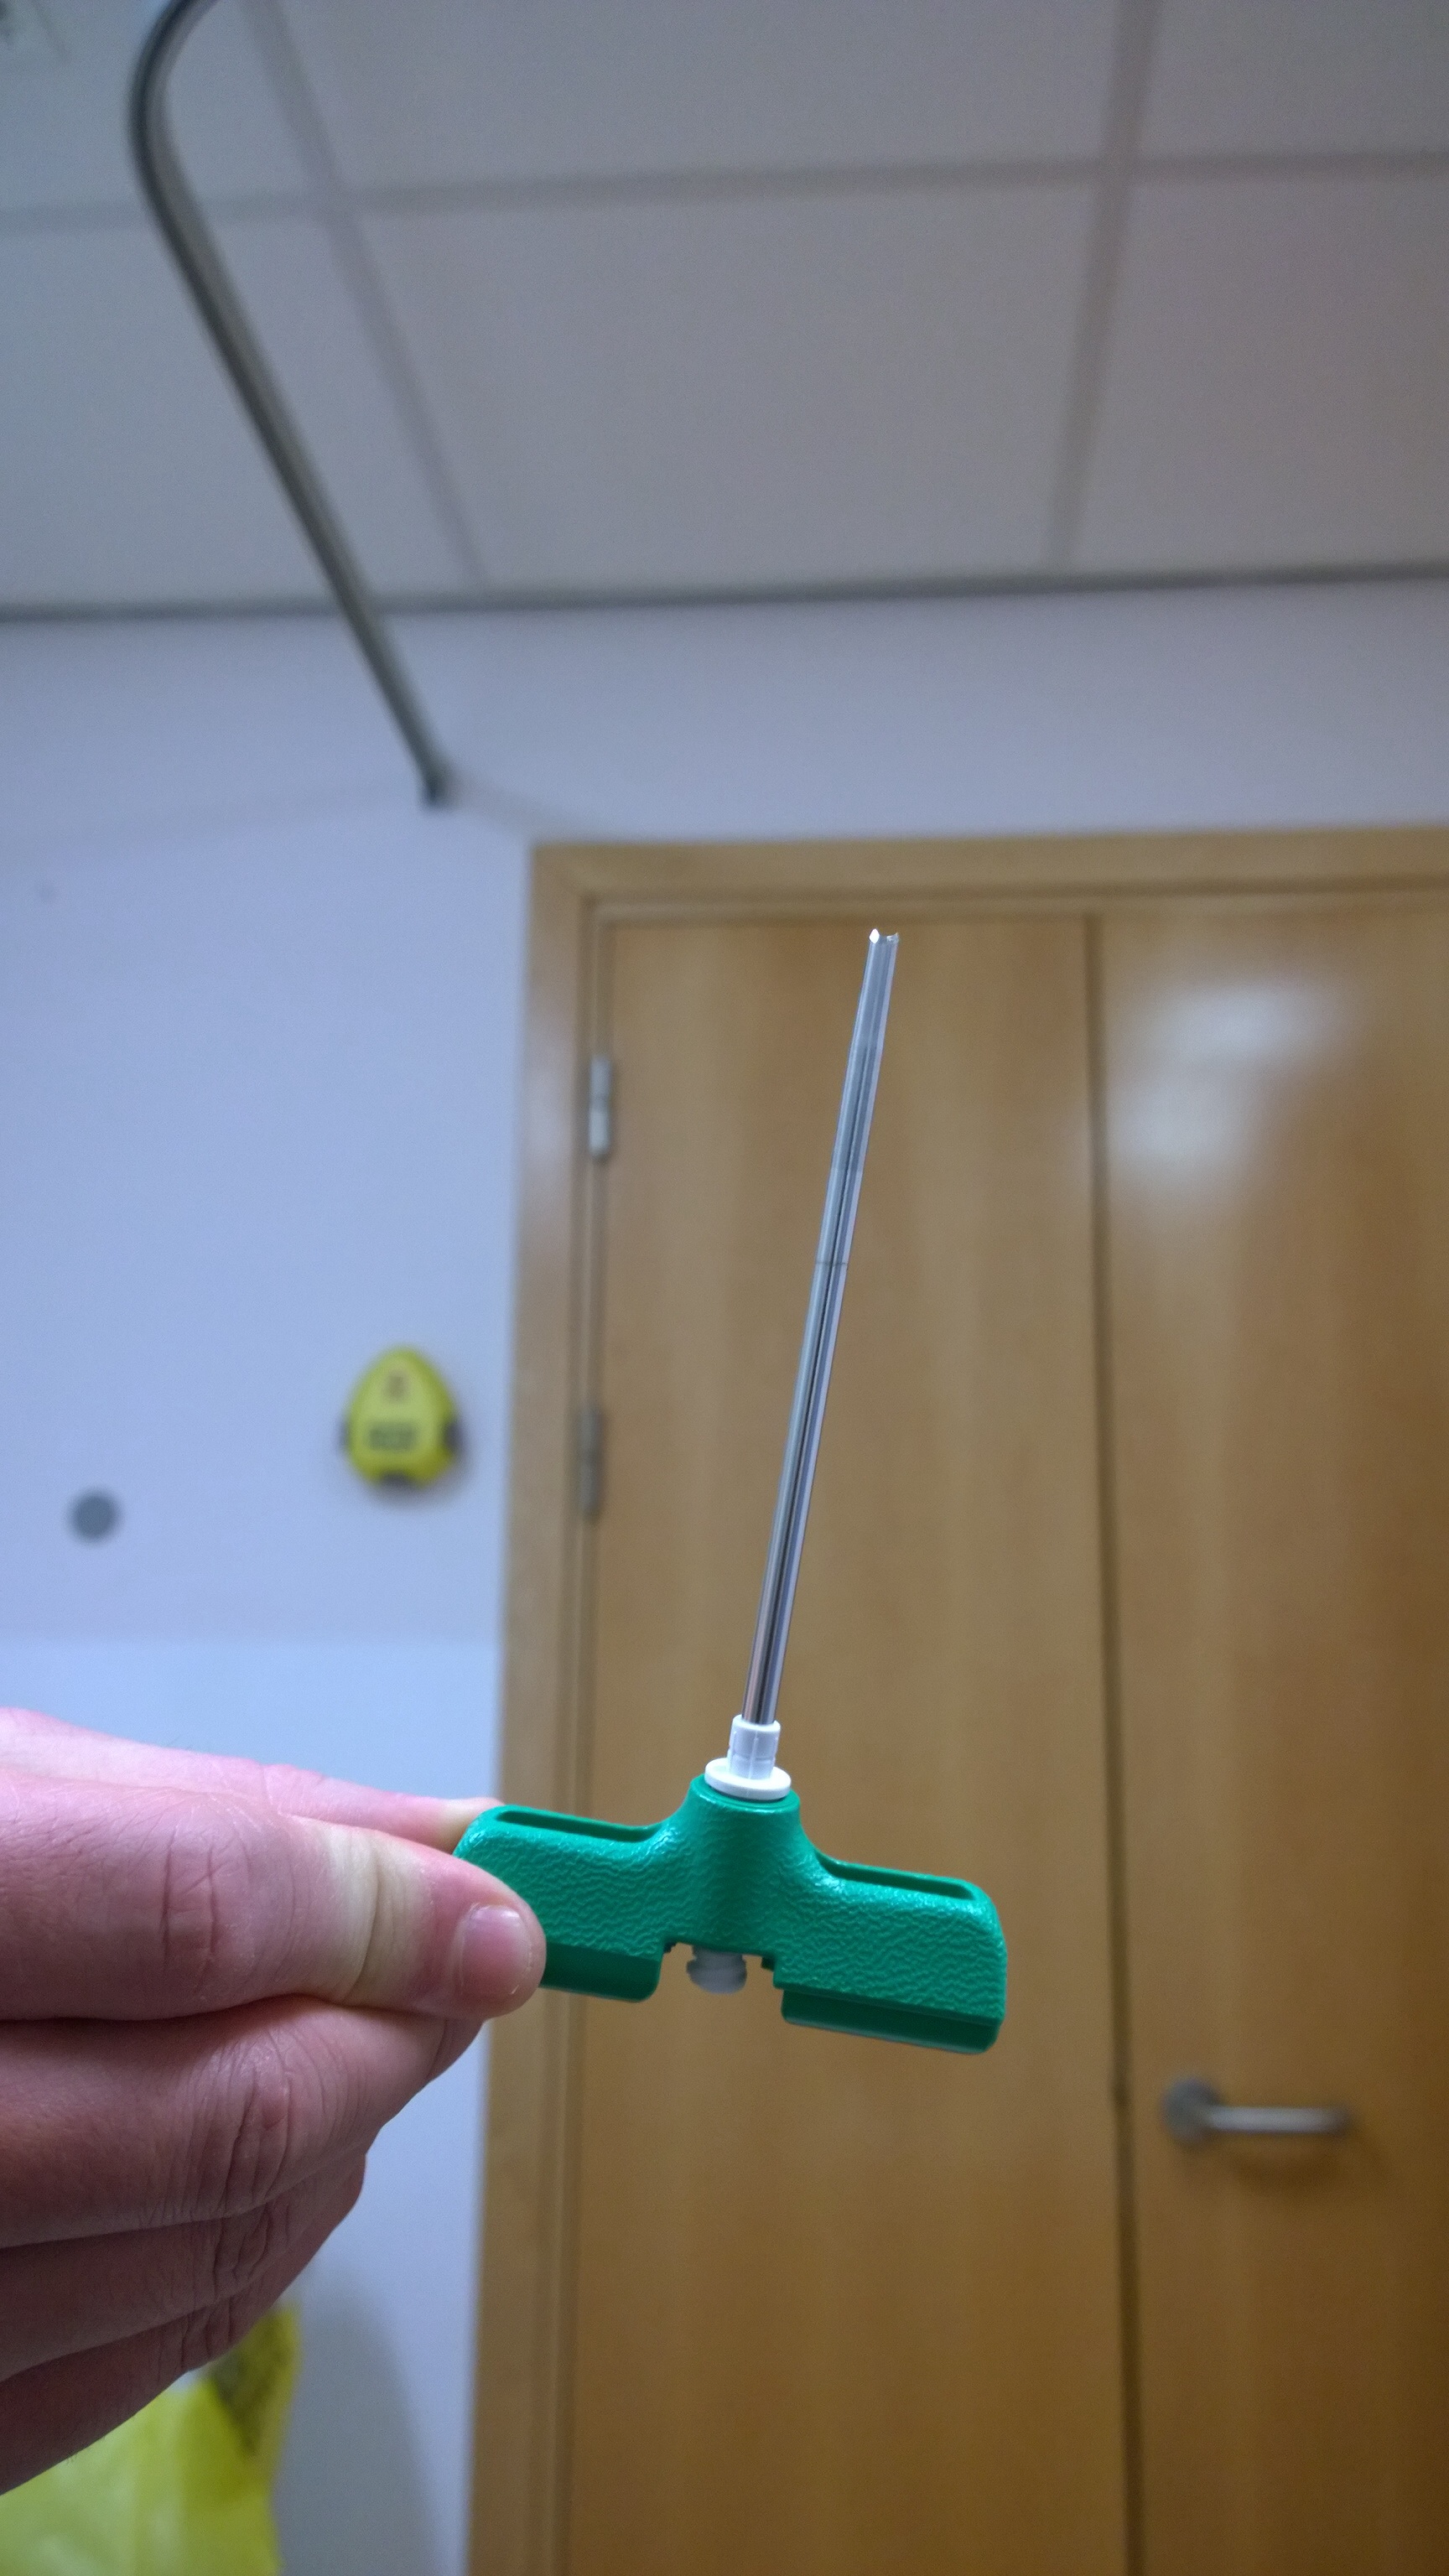
step 3 – trephine biopsy of bone marrow
This final stage is to collect a plug of bone marrow for further testing. As mentioned before, my bones are fairly hard which means that this process was a little uncomfortable for me. Sometimes this can be performed with a small hand drill but talking to the nurse, he preferred to make the cut by hand as the drill can be a little too rough and also can give poor samples. This next needle is slightly larger than the first and is pushed through the skin using a slight and gentle turning motion to get through to the bone. The bone is then cut by turning the needle and pushing at the same time to collect the sample. The sample is taken through the tube and pulled out in one piece as a plug. (A bit like uncorking a bottle of wine!) From my experience, although a little uncomfortable, and lasting slightly longer, this was no more unpleasant than the first procedure. And I will honestly say that having teeth removed is much more uncomfortable.
step 4 – dressing and healing
Once complete, the nurse applied pressure to stop the bleeding and applied a dressing. I was advised to sit for a few minutes to assist with the pressure. The procedure was performed about 2 hours ago as I write this and although I can feel that I have a wound, the pain is no more than a dull sensation in my hip and a bit of stinging on the skin, which could easily be where hairs are trapped in the dressing adhesive!
so in summary, the procedure is about 15-20 minutes long, and although uncomfortable, I will be much less nervous going into the second assessment after my first phase of Chemo.
